

Pocket Guide
- On Windows PC: Press Start button >> Control Panel >> System & Security >> BitLocker Drive Encryption >> Turn on BitLocker >> Next >> Shutdown >> Require a PIN >> Enter PIN >> Confirm PIN >> Set PIN >> Print the Recovery Key >> Next >> Print a Copy.
Bitlocker, also known as Bitlocker Drive Encryption, helps users to protect their data and privacy. It uses an Advanced Encryption Standard algorithm with a 128 or 256-bit key. Bitlocker has been a part of the Windows operating system for many years. It offers many features for its users, like encrypted hard drive support, efficient device encryption, and more. If you want to use Bitlocker, you must activate it by following simple steps.
System Requirements
To use BitLocker, your computer or PC should have certain system requirements. It supports certain operating devices like Windows 10, 8, and 7.
- Windows 10 – Education, Pro, or Enterprise version
- Windows 8 – Professional or Enterprise version
- Windows 7 – Enterprise or Ultimate version. Also, you need to install the higher version of the Trusted Platform Module ( TPM). It is necessary to activate or enable this in Windows 7.
Note: You need to log in to BitLocker as an administrator, and you must have access to the printer to print the recovery key.
How to Activate BitLocker on Windows
Before starting the process, you must verify your Windows version and TPM status. If your PC meets the Windows version and TPM requirements, you can follow the steps to enable BitLocker.
1. First, press the Start button to click on Control Panel.
Information Use !!
Concerned about online trackers and introducers tracing your internet activity? Or do you face geo-restrictions while streaming? Get NordVPN - the ultra-fast VPN trusted by millions, which is available at 69% off + 3 Months Extra. With the Double VPN, Split tunneling, and Custom DNS, you can experience internet freedom anytime, anywhere.

2. Select System & Security to hit the BitLocker Drive Encryption.
3. Now, tap the Turn on BitLocker option.
4. Now, BitLocker will scan your PC to check whether it will meet the system requirement. Click Next if you want to turn on BitLocker manually on the computer.
- If your PC meets the requirement of the system, the setup wizard option resumes with the BitLocker Startup Preferences.
5. If prompted, remove any flash drives or other external storage devices. Then, click Shutdown to proceed.
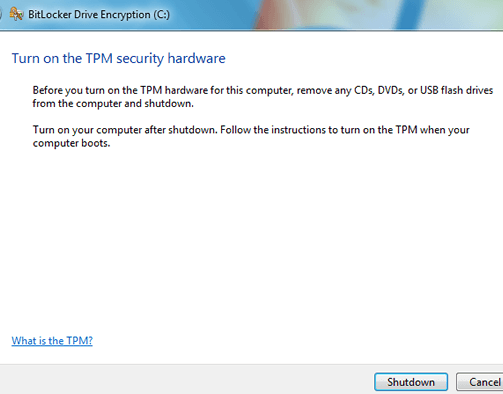
6. Power on your PC and proceed with the initializing TMP. Wait for the BitLocker setup wizard to resume. Click Next.
7. After seeing the Startup preference page, tap the Require a PIN at every startup.
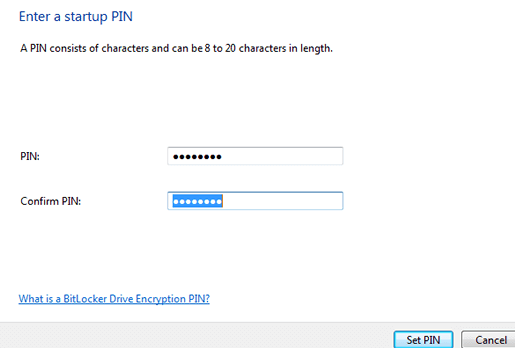
8. Now, enter the PIN that should be from 8 to 20 characters and again re-enter it in the Confirm PIN column. Then, tap the Set PIN option.
- You need to enter the PIN code whenever you start using the system.
9. To save the recovery key, tap the Print the Recovery Key option and hit the Next button to proceed.
- Ensure that your PC is connected to a printer.
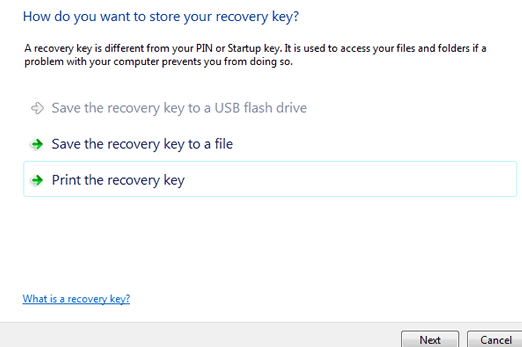
10. Print a copy of your recovery key for later use to activate BitLocker.
11. Finally, you will be prompted to restart your computer to begin the encryption process
- If you see Preparations need to be made to your computer to enable BitLocker on your screen, tap the Next option.
Note: You can Activate Avast Premium Security in four different ways.
How to Disable BitLocker
1. Select the Start menu and search for Control Panel
2. Now, tap the System and Security option and choose BitLocker Drive Encryption.
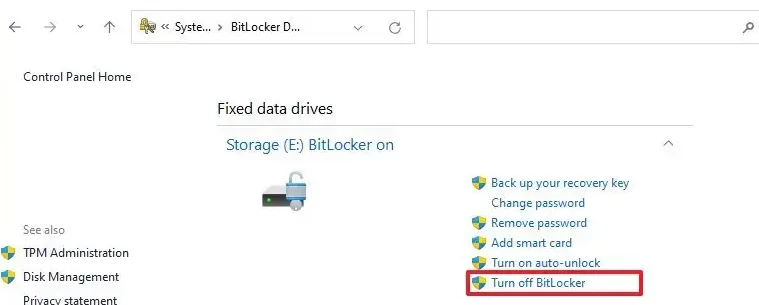
3. Choose the drive to disable or turn off BitLocker encryption.
4. Finally, confirm and tap the Turn off BitLocker button to disable the BitLocker.
FAQ
BitLocker is free for all operating devices, and you can easily set it up.
BitLocker integrates with Active Directory Domain Services (AD DS) to offer centralized key management. Also, no recovery information is backed up to the Active Directory.
Disclosure: If we like a product or service, we might refer them to our readers via an affiliate link, which means we may receive a referral commission from the sale if you buy the product that we recommended, read more about that in our affiliate disclosure.